
Do you setup WordPress sites often and you want instructions you can repeat quickly? The purpose of this HOWTO is to provide a series of copy and paste commands you can use over and over to setup WordPress on an Ubuntu 20 LTS server using DigitalOcean for your future clients.
Prerequisites
Before we begin, we’ll need to establish a few items:
- You need a DigitalOcean account to follow along in this tutorial. If you don’t have one, head on over there and sign up.
- In this HOWTO I will be used
techops$,developer$androot#in front of all my commands, this is to let you know the account you should be logged in as when executing the commands. - I assume you have generated a private public ssh keys and uploaded your public key to DigitalOcean.
- I assume you know how to use
vimin your linux console. - I assume you have purchased a domain name. For this HOWTO, I will be using idiotbank.com, so you’ll need to replace all instances of this domain with your own. I will be using Namecheap as my domain name registrar.
- This article was written in 2021 and if you are reading this at a different year, much will have changed!
- I am assuming basic proficiency level with linux and if you don’t understand a command you will look it up for more details.
Instructions
Setup Droplet
Log into your DigitalOcean dashboard and click the Create > Droplet button. The following options should be selected at minimum:
- Choose an image: Ubuntu 20.04 (LTS) x64
- Choose a plan: (1) Regular Intel with SSD (2) $10/mo
- Choose a datacenter region: Toronto
- Select additional options: IPv6, Monitoring
- Authentication: SSH Keys - Your account selected
- Choose a hostname: idiotbank-wordpress
- Finally click Create Droplet button when you are ready
Once the droplet has been created, please make a note of the IP addresses the droplet uses:
- IPv4: 159.203.12.17
- IPv6: 2604:a880:cad:d0::d92:3001
Notes:
- Please be aware that through this tutorial we will use these IP addresses, you must replace these values with your own. If you don’t do this then the rest of this tutorial will be very confusing!*
- In the side sub-menu, please click Snapshots and be aware that throughout this tutorial you will periodically take snapshots of your droplet. Also this is where you will restore your droplet if you messed anything up while setting up your WordPress server.
Setup DNS
While being logged in your DigitalOcean, click the Networking menu item on the side menu. In the tabs, please click the Domains item. Once on this page, add your domain name in the textfield, select your project and click Add Domain button. Once clicked please make the following changes by going to the appropriate record (A, AAA, CNAME, ETC) and fill out the fields as follows:
- A Record
- HOSTNAME: idiotbank.com
- WILL DIRECT TO: 159.203.12.17
- TTL (SECONDS): 80
- AAAA Record
- HOSTNAME: idiotbank.com
- WILL DIRECT TO: 2604:a880:cad:d0::d92:3001
- TTL (SECONDS): 80
- CNAME Record
- HOSTNAME: *
- IS AN ALIAS OF: @
- TTL (SECONDS): 80
Please log into your domain name registrar and point your purchased domain to DigitalOcean nameservers. The following article published by DigitalOcean provides various setup instructions you can follow. Please find your domain name registrar and follow their instructions. Once you have finished, please wait a few moments and then resume this tutorial.
Connect to your Droplet
In your developers machine, please connect by running the command:
developer$ ssh -l root 159.203.12.17Once you are connected then congratulations, you are ready to begin!
Setup administrators account
We will create an administrative account called techops so we don’t use our root account - this is done on all Linux machines for security purposes, for more information please read this article. You can name your administrative account whatever you like, for example bart, however for this article we will refer to the techops user account as our administrators account.
Begin with the following:
root# adduser techops
root# usermod -aG sudo techops
Change into our new account
root# su - techops
Setup Basic Firewall
Configure a basic firewall which we will grow with in our system.
techops$ sudo ufw allow OpenSSH
techops$ sudo ufw enable
techops$ sudo ufw status
Basic Ubuntu Update
Update all the packages we have in our system. Do not skip this step.
techops$ sudo apt updateSetup Basic Nginx
Install, and configure our web-server
techops$ sudo apt install nginx
techops$ sudo ufw app list
techops$ sudo ufw allow 'Nginx HTTP'
techops$ sudo ufw status
Check to see if nginx has been started and running in the background. You should see no error messages.
techops$ sudo systemctl status nginxIn your browser check http://159.203.12.17 and you should see an output.
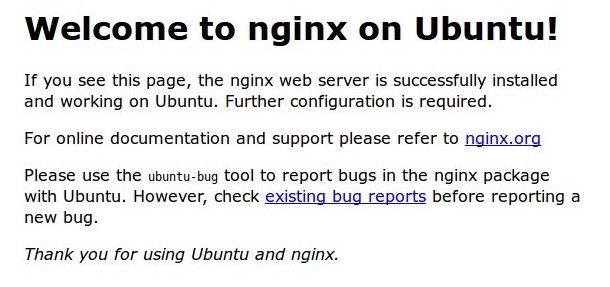
If you see a page load up with no errors then please take a snapshot in your DigitalOcean droplet so you can return to this latest working configuration later in the tutorial.
Setup Website Home Directory and Domain Name
Run the following:
techops$ sudo mkdir -p /var/www/idiotbank.com/html
techops$ sudo chown -R $USER:$USER /var/www/idiotbank.com/html
techops$ sudo chmod -R 755 /var/www/idiotbank.com
techops$ vi /var/www/idiotbank.com/html/index.html
Please note that you just ran the vi linux command. If you are not familiar with how to use vi then please watch this quick youtube explaining how to use it. Once you understand proceed forward with this tutorial - do not proceed forward if you do not understand!
Inside, add the following sample HTML and save the file:
<!-- /var/www/idiotbank.com/html/index.html -->
<html>
    <head>
        <title>Welcome to idiotbank.com!</title>
    </head>
    <body>
        <h1>Success!  The idiotbank.com server block is working!</h1>
    </body>
</html>
Next load up our virtual host configuration:
techops$ sudo vi /etc/nginx/sites-available/idiotbank.comCopy and paste the following code:
server {
        listen 80;
        listen [::]:80;

        root /var/www/idiotbank.com/html;
        index index.html index.htm index.nginx-debian.html;

        server_name idiotbank.com www.idiotbank.com;

        location / {
                try_files $uri $uri/ =404;
        }
}
Attach our new virtual host to our web-server:
techops$ sudo ln -s /etc/nginx/sites-available/idiotbank.com /etc/nginx/sites-enabled/Open up our web-server’s configuration:
techops$ sudo vi /etc/nginx/nginx.confSearch through the file until you see the following code and uncomment it out and save the file:
...
http {
    ...
    server_names_hash_bucket_size 64;
    ...
}
...
Verify our web-server works
techops$ sudo nginx -tNote: There should be no errors here, if there are please investigate before proceeding any further!
Restart our web-server
techops$ sudo systemctl restart nginxNow go to http://idiotbank.com and you should see a page!
If you see a page load up with no errors then please take a snapshot in your DigitalOcean droplet so you can return to this latest working configuration later in the tutorial.
Setup MariaDB Database
The database is an essential piece we cannot forget. While we have the option of using MySQL, in this tutorial we will use MariaDB instead.
Begin by running the following:
techops$ sudo apt update
techops$ sudo apt install mariadb-server
techops$ sudo mysql_secure_installation
Access our database
techops$ sudo mariadbCreating an Administrative User that Employs Password Authentication.
GRANT ALL ON *.* TO 'admin'@'localhost' IDENTIFIED BY '123password' WITH GRANT OPTION;
FLUSH PRIVILEGES;
Note: This account is the administrative account which you can use to access all the databases in our system. Please be sure to use a more secure password!
techops$ sudo systemctl status mariadbYou should get no errors after running the above command.
Enable database on startup
techops$ sudo systemctl enable mariadbFinally check
techops$ mysqladmin -u admin -p versionSetup PHP
Let’s install our server-side programming language. Start by running the following to install our dependencies:
techops$ sudo apt install php-fpm php-mysqlOpen up our virtual host configuration:
techops$ sudo vi /etc/nginx/sites-available/idiotbank.comAnd replace completely with the following copy and paste:
server {
    listen 80;
    server_name idiotbank.com www.idiotbank.com;
    root /var/www/idiotbank.com;

    index index.html index.htm index.php;

    location / {
        try_files $uri $uri/ =404;
    }

    location ~ \.php$ {
        include snippets/fastcgi-php.conf;
        fastcgi_pass unix:/var/run/php/php7.4-fpm.sock;
     }

    location ~ /\.ht {
        deny all;
    }

}
Unlink the following:
techops$ sudo unlink /etc/nginx/sites-enabled/defaultOpen up our index file
techops$ sudo vi /var/www/idiotbank.com/index.htmlUpdate the file with this copy and paste
<html>
  <head>
    <title>idiotbank.com website</title>
  </head>
  <body>
    <h1>Hello World!</h1>

    <p>This is the landing page of <strong>idiotbank.com</strong>.</p>
  </body>
</html>
Next create the following file
techops$ sudo vi /var/www/idiotbank.com/info.phpAnd copy and paste the following into it
<?php
phpinfo();
Finally in your browser visit the http://idiotbank.com/info.php URL path and you should see a success message detailing the libraries used.
If you see a page load up with no errors then please take a snapshot in your DigitalOcean droplet so you can return to this latest working configuration later in the tutorial.
Setup Wordpress
The next instructions will be pertaining to setting up WordPress on our server. This section is divided into further sub-sections.
Setup WordPress Database
Enter our database
techops$ mysql -u admin -pAnd create our WordPress database
CREATE DATABASE wordpress DEFAULT CHARACTER SET utf8 COLLATE utf8_unicode_ci;Create our WordPress user
CREATE USER 'wordpressuser'@'localhost' IDENTIFIED BY '123password';

GRANT ALL ON wordpress.* TO 'wordpressuser'@'localhost';

EXIT;
Setup WordPress PHP Dependencies
Install our dependencies
techops$ sudo apt install php-curl php-gd php-intl php-mbstring php-soap php-xml php-xmlrpc php-zipRestart our php
techops$ sudo systemctl restart php7.4-fpmSetup Nginx for WordPress
Open virtual host configuration:
techops$ sudo vi /etc/nginx/sites-available/idiotbank.comReplace the contents of the file by copy and pasting the follwing:
server {
    listen 80;
    server_name idiotbank.com www.idiotbank.com;
    root /var/www/idiotbank.com/wordpress;

    index index.html index.htm index.php;

    location / {
       # try_files $uri $uri/ =404;
       try_files $uri $uri/ /index.php$is_args$args;
    }

    location ~ \.php$ {
        include snippets/fastcgi-php.conf;
        fastcgi_pass unix:/var/run/php/php7.4-fpm.sock;
     }

    location ~ /\.ht {
        deny all;
    }

    location = /favicon.ico { log_not_found off; access_log off; }
    location = /robots.txt { log_not_found off; access_log off; allow all; }
    location ~* \.(css|gif|ico|jpeg|jpg|js|png)$ {
        expires max;
        log_not_found off;
    }
}
Next check to see if any configuration issues occur
techops$ sudo nginx -tIf no errors occur then please run the following to reload our web-server
techops$ sudo systemctl reload nginx(Actually) Setup WordPress
Run the following which will download the latest WordPress files, and setup our folder structure for the project:
techops$ cd /tmp
techops$ curl -LO https://wordpress.org/latest.tar.gz
techops$ tar xzvf latest.tar.gz
techops$ cp /tmp/wordpress/wp-config-sample.php /tmp/wordpress/wp-config.php
techops$ sudo cp -a /tmp/wordpress/. /var/www/idiotbank.com/wordpress
techops$ sudo chown -R www-data:www-data /var/www/idiotbank.com/wordpress
Run the following and copy the received content into your clipboard.
techops$ curl -s https://api.wordpress.org/secret-key/1.1/salt/Open up your WordPress configuration file.
techops$ sudo vi /var/www/idiotbank.com/wordpress/wp-config.phpPlease make sure the following tasks are complete with your open configuration file:
- a. Change the database name
- b. Change the database user
- c. Change the database password
- d. Paste in the clipboard for the dummy section
- e. Append
define( 'FS_METHOD', 'direct' );to the end of the file
Save the file, now open up your browser and enter the http://idiotbank.com/wordpress URL path. If everything works fine, you should see a WordPress configuration screen - Please fill out your form.
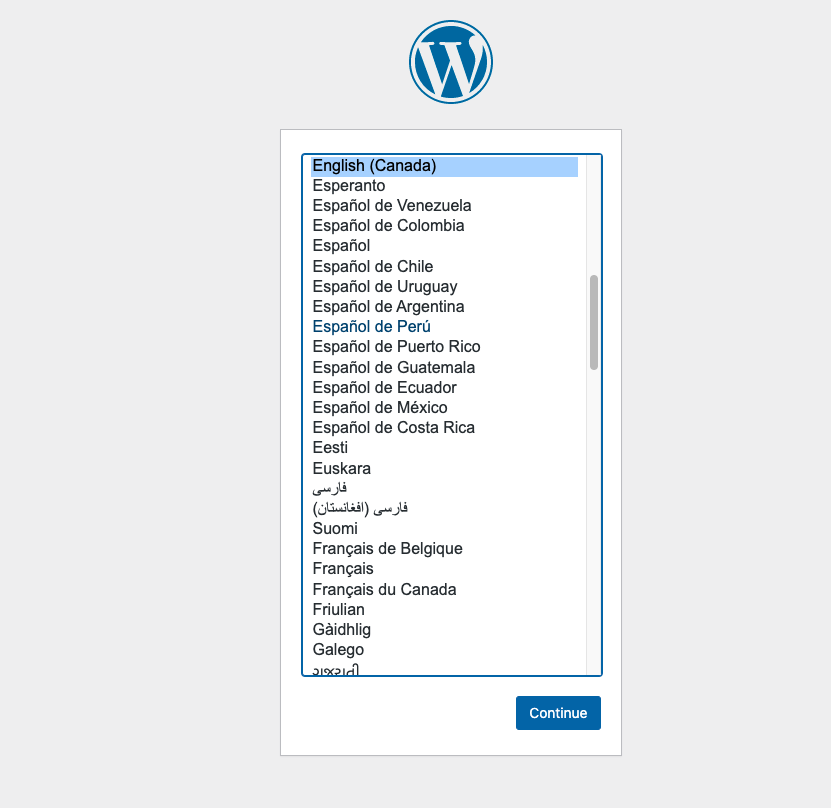
If you see a page load up with no errors then please take a snapshot in your DigitalOcean droplet so you can return to this latest working configuration later in the tutorial.
Setup SSL
Install our dependencies:
techops$ sudo apt install certbot python3-certbot-nginxReload our web-server:
techops$ sudo systemctl reload nginxUpdate our firewall to make it advanced:
techops$ sudo ufw status
techops$ sudo ufw allow 'Nginx Full'
techops$ sudo ufw delete allow 'Nginx HTTP'
Install our SSL certificate and follow the instructions when prompted:
techops$ sudo certbot --nginx -d idiotbank.com -d www.idiotbank.comNow open up your browser and enter the https://idiotbank.com URL path. If everything works fine, you should see a WordPress page running without problems.
If you see a page load up with no errors then please take a snapshot in your DigitalOcean droplet so you can return to this latest working configuration later in the tutorial.
Special Thanks:
The following articles were invaluable and more-then-inspired this article.
- https://www.digitalocean.com/community/tutorials/initial-server-setup-with-ubuntu-20-04
- https://www.digitalocean.com/community/tutorials/how-to-install-nginx-on-ubuntu-20-04
- https://www.digitalocean.com/community/tutorials/how-to-install-mariadb-on-ubuntu-20-04
- https://www.digitalocean.com/community/tutorials/how-to-install-linux-nginx-mysql-php-lemp-stack-on-ubuntu-20-04
- https://www.digitalocean.com/community/tutorials/how-to-install-wordpress-with-lemp-on-ubuntu-20-04
- https://www.digitalocean.com/community/tutorials/how-to-secure-nginx-with-let-s-encrypt-on-ubuntu-20-04
Cover photo by Launchpresso on Unsplash.