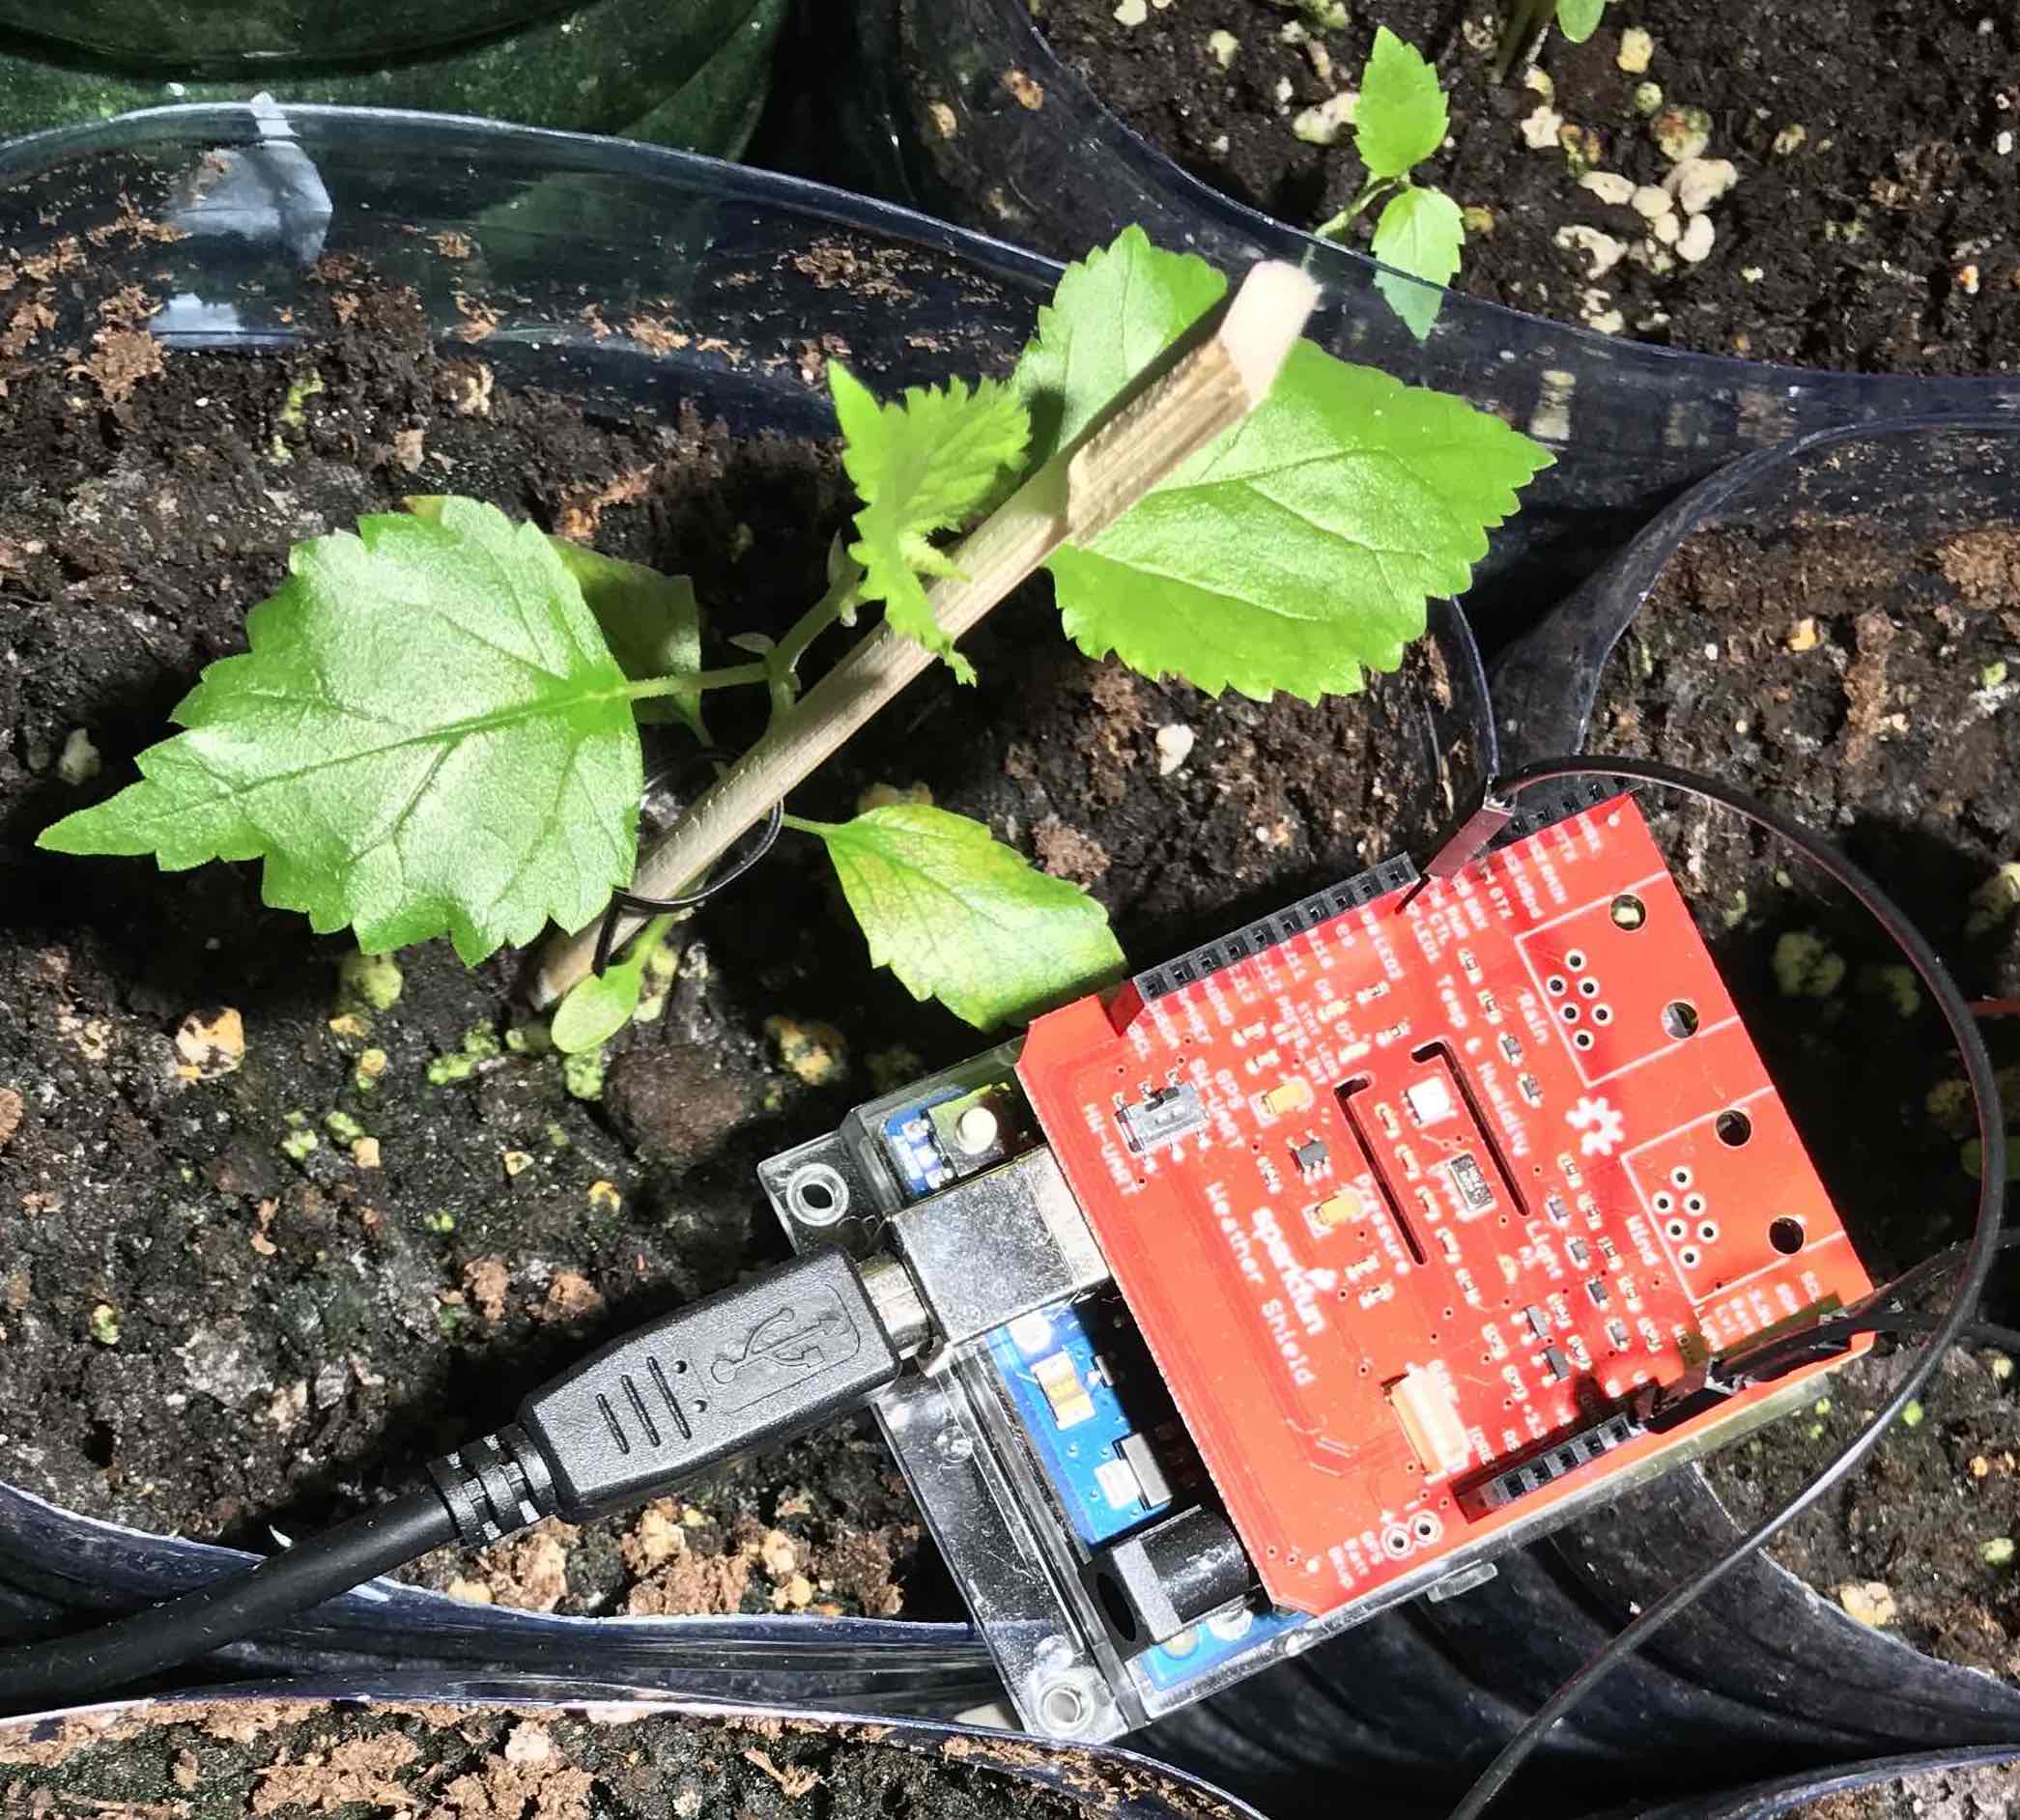
SparkFun Weather Shield monitoring dutifully a red mulberry seedling, the code is powered by what you will learn in this blog post.
The purpose of blog post is to explain how to write a Golang application which can poll time-series data from a SparkFun Weather Shield (DEV-13956).
Before you begin, I am assuming the following:
- You are running either Linux or a Mac
- You have purchased 1x - SparkFun Weather Shield (DEV-13956) device.
- You have purchased 1x - Arduino Uno device.
- You have successfully assembled the Shield with the Arduino device and connected it through USB to your computer.
- You are running
go1.16.3or greater.
Setup the Arduino Device
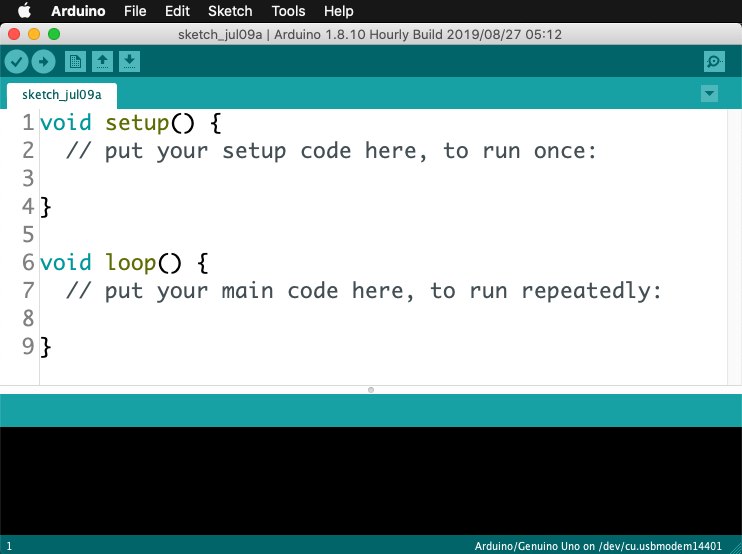
First step after having assembled the shield is you will need to download the Arduino IDE to your computer, please do so now. Afterwards open the IDE. You should see something as follows:
Then highlight all the code in the terminal and delete it. Afterwards copy and paste the following code:
/*
 SparkFun Weather Shield (DEV-13956) Writer
 By: Bartlomiej Mika
 Date: July 9th, 2021
 License: BSD 3-Clause License

 The source code which powers the Arduino device that collects time-series data
 that will be outputed to the USB serial device.

 The following data will be recorded:
 (1) Humidity/Temperature Sensor --- Si7021
 (2) Barometric Pressure --- MPL3115A2
 (3) Light Sensor --- ALS-PT19

 This code based on utilizing the following Arduino shields / external sensor(s):
 - SparkFun Weather Shield (DEV-13956)
*/

#include <ArduinoJson.h>
#include <Wire.h> //I2C needed for sensors
#include "SparkFunMPL3115A2.h" //Pressure sensor - Search "SparkFun MPL3115" and install from Library Manager
#include "SparkFun_Si7021_Breakout_Library.h" //Humidity sensor - Search "SparkFun Si7021" and install from Library Manager

// Create instance of our sensors.
MPL3115A2 myPressure;
Weather myHumidity;

// Hardware pin definitions
const byte REFERENCE_3V3 = A3;
const byte LIGHT = A1;

// Set variables used by our application
int id_incr_count = 1; // Variable used to keep track of the output count.
char rx_byte = 0;

/**
 * The main entry point into our application.
 */
void setup() {
  // Initialize Serial port
  Serial.begin(9600);
  while (!Serial) continue;

  // SETUP OUR INSTRUMENTS
  //------------------------------------
  // --- Weather Shield ---
  pinMode(REFERENCE_3V3, INPUT);
  pinMode(LIGHT, INPUT);

  //Configure the pressure sensor
  myPressure.begin(); // Get sensor online
  myPressure.setModeBarometer(); // Measure pressure in Pascals from 20 to 110 kPa
  myPressure.setOversampleRate(7); // Set Oversample to the recommended 128
  myPressure.enableEventFlags(); // Enable all three pressure and temp event flags

  //Configure the humidity sensor
  myHumidity.begin();

  // FINISH SETTING UP
  // We must print this JSON string to let our service computer know this
  // code is ready to be polled.
  // Create our JSON object.
  StaticJsonDocument<200> doc;

  // Add system values in the document
  doc["status"] = "READY";
  doc["runtime"] = millis();
  doc["id"] = id_incr_count++;

  // Add an array.
  JsonArray data = doc.createNestedArray("sensors");
  data.add("humidity"); // relative humidity
  data.add("temperature");
  data.add("pressure"); // barometric pressure
  data.add("illuminance");

  // Generate the minified JSON and send it to the Serial port.
  serializeJson(doc, Serial);

  // Start a new line
  Serial.println();
}

/**
 * The main runtime loop of our application.
 */
void loop() {
  if (Serial.available() > 0) {    // is a character available?
    rx_byte = Serial.read();       // get the character

    // check if a number was received
    if ((rx_byte >= '0') && (rx_byte <= '9')) {
      poll_all_instruments();
    }
  }
}


void poll_all_instruments() {
  //Check Humidity Sensor
  float humidity = myHumidity.getRH();

  if (humidity == 998) //Humidty sensor failed to respond
  {
    Serial.println("I2C communication to sensors is not working. Check solder connections.");

    //Try re-initializing the I2C comm and the sensors
    myPressure.begin();
    myPressure.setModeBarometer();
    myPressure.setOversampleRate(7);
    myPressure.enableEventFlags();
    myHumidity.begin();
  }
  else
  {
    // Create our JSON object.
    StaticJsonDocument<511> doc;

    // Add system values in the document
    doc["status"] = "RUNNING";
    doc["runtime"] = millis();
    doc["id"] = id_incr_count++;

    // HUMIDITY
    doc["humidity_value"] = humidity;
    doc["humidity_unit"] = "%";

    // TEMPERATURE (FROM HUMIDITY INSTRUMENT)
    float temp_h = myHumidity.getTempF();
    doc["temperature_primary_value"] = temp_h;
    doc["temperature_primary_unit"] = "F";

    // PRESSURE
    float pressure = myPressure.readPressure();
    doc["pressure_value"] = pressure;
    doc["pressure_unit"] = "Pa";

    // TEMPERATURE (FROM PRESSURE INSTRUMENT)
    float temp_p = myPressure.readTempF();
    doc["temperature_secondary_value"] = temp_p;
    doc["temperature_secondary_unit"] = "F";

    // ALTITUDE
    float altitude = myPressure.readAltitudeFt();
    doc["altitude_value"] = altitude;
    doc["altitude_unit"] = "ft";

    // ILLUMINANCE
    float light_lvl = get_light_level();
    doc["illuminance_value"] = light_lvl;
    doc["illuminance_unit"] = "V";

    // Generate the minified JSON and send it to the Serial port.
    serializeJson(doc, Serial);

    // Start a new line
    Serial.println();
  }
}

//Returns the voltage of the light sensor based on the 3.3V rail
//This allows us to ignore what VCC might be (an Arduino plugged into USB has VCC of 4.5 to 5.2V)
// https://learn.sparkfun.com/tutorials/arduino-weather-shield-hookup-guide-v12
float get_light_level()
{
  float operatingVoltage = analogRead(REFERENCE_3V3);

  float lightSensor = analogRead(LIGHT);

  operatingVoltage = 3.3 / operatingVoltage; //The reference voltage is 3.3V

  lightSensor = operatingVoltage * lightSensor;

  return (lightSensor);
}
Please install the following libraries using the Arduino Library Manager:
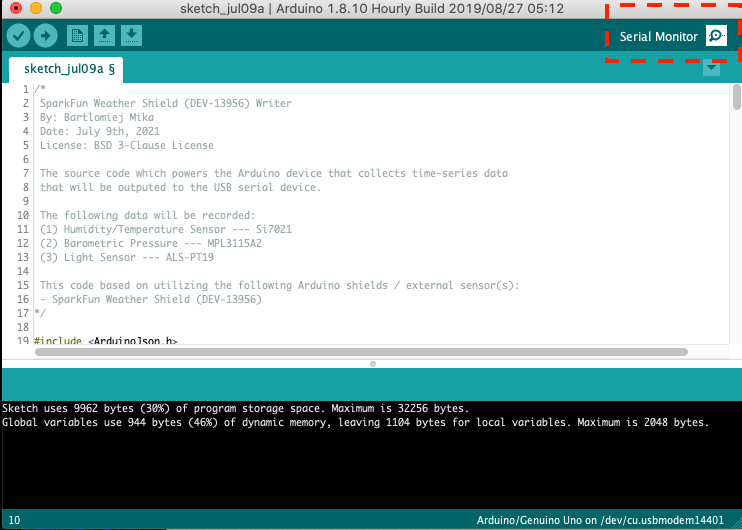
Click save and save the file somewhere, afterwords click the Verify button and you should see a success message as follows:

If you have received the above message, please continue by clicking the Upload button. The IDE will compile and then upload to the device. Once uploaded the Arduino device is running with the code we’ve written! Let’s test out our code, please click the Serial Monitor icon now:
Once you click it you should see the Serial Monitor as follows:
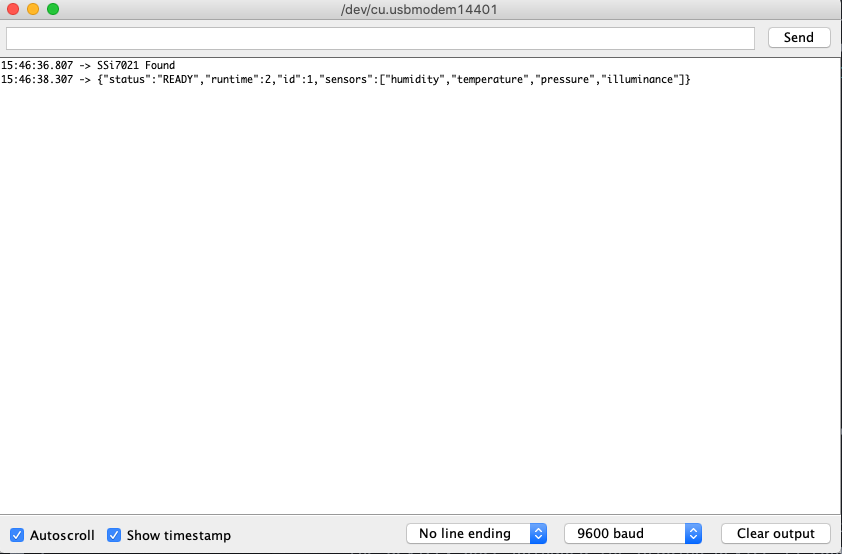
In the textfield, type in letter one (ex: 1) and hit Send. If everything works, you should see something like this:
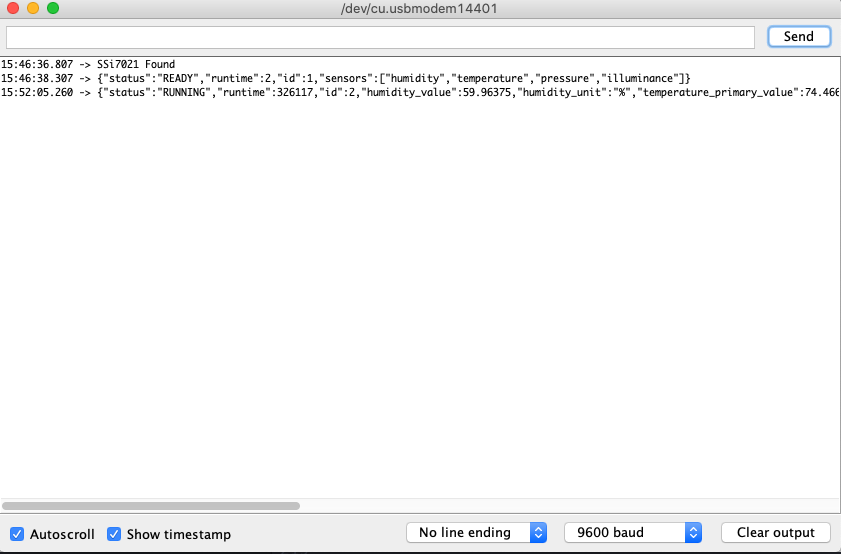
Hurray! You have successfully connected and polled your first data from the SparkFun Weather Shield (DEV-13956) device. We’re not finished yet, close the Serial Monitor, go to the menu and click port. When you open the menu please write down the URL path of the Arduino Uno device.
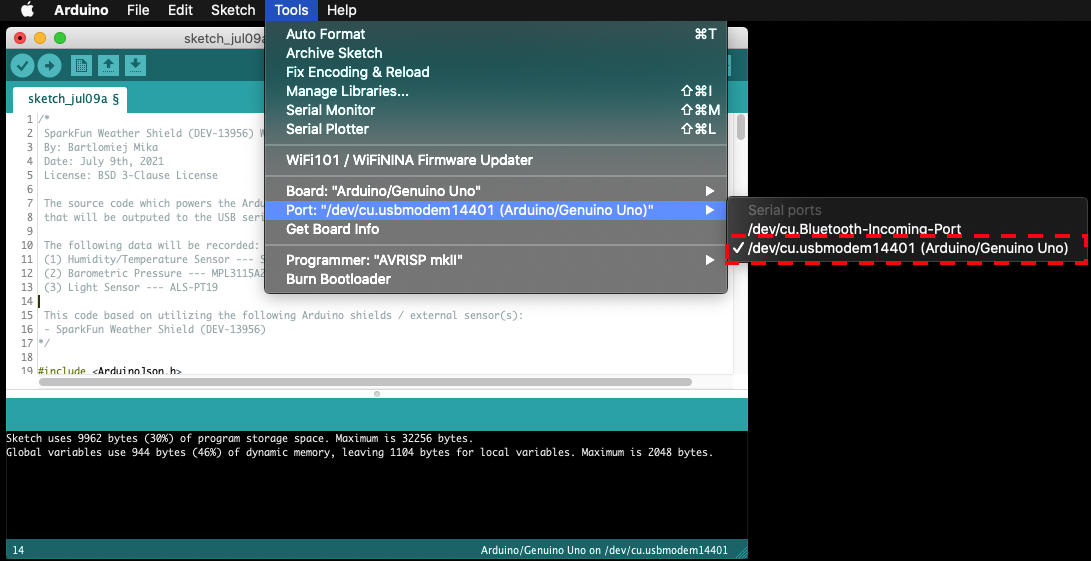
For example, on my screen the value is /dev/cu.usbmodem14401.
Please save your value as you will need it next!
Setup the Golang Code
Start off by setting up the an empty repository in github.
Start the project by calling it serialreader-cli. Here is how I setup the code:
cd ~/go/src/github.com/bartmika
git clone https://github.com/bartmika/serialreader-cli.git
cd serialreader-cli
Initialize golang modules.
go mod init github.com/bartmika/serialreader-cliInstall our project’s dependencies.
go get github.com/spf13/cobra
go get github.com/tarm/serial
Setup the project structure - this means you will need to create the folders and empty files you see in the Project Hierarchy below:
Project Hierarchy
📁 serialreader-cli
│   📄 main.go
│
└───📁 cmd
|   |
|   └───📄 read_once.go
|       📄 root.go
|       📄 version.go
|
└───📁 internal
    |
    └───📁 utils
        |
        └───📄 sparkfun_weather_shield_reader.go
What are going to do? We want our project structured in such a way that it uses the spf13/cobra package so we can easily commands in our application.
To begin, please copy and paste the following code into those empty files.
(1 of 5) main.go
package main // github.com/bartmika/serialreader-cli/main.go

import (
	"github.com/bartmika/serialreader-cli/cmd"
)

func main() {
	cmd.Execute()
}
(2 of 5) cmd/root.go
package cmd // github.com/bartmika/serialreader-cli/cmd/root.go

import (
	"fmt"
	"os"

	"github.com/spf13/cobra"
)

var rootCmd = &cobra.Command{
	Use:   "serialreader-cli",
	Short: "Read time-series data",
	Long:  `Read time-series data from a connected Arduino device with an attached 'SparkFun Weather Shield' device.`,
	Run: func(cmd *cobra.Command, args []string) {
		// Do nothing...
	},
}

func Execute() {
	if err := rootCmd.Execute(); err != nil {
		fmt.Fprintln(os.Stderr, err)
		os.Exit(1)
	}
}
(3 of 5) cmd/version.go
package cmd // github.com/bartmika/serialreader-cli/cmd/version.go

import (
	"fmt"

	"github.com/spf13/cobra"
)

func init() {
	rootCmd.AddCommand(versionCmd)
}

var versionCmd = &cobra.Command{
	Use:   "version",
	Short: "Print the version number",
	Long:  `Print the current version that this cli is on.`,
	Run: func(cmd *cobra.Command, args []string) {
		fmt.Println("serialreader-cli v1.0")
	},
}
(4 of 5) internal/utils/sparkfun_weather_shield_reader.go
package utils // github.com/bartmika/serialreader-cli/internal/utils/sparkfun_weather_shield_reader.go

import (
	"fmt"
	"encoding/json"
	"log"
	"time"

	"github.com/tarm/serial"
)

const RX_BYTE = "1"

// The time-series data structure used to store all the data that will be
// returned by the `SparkFun Weather Shield` Arduino device.
type TimeSeriesData struct {
	Status                     string  `json:"status,omitempty"`
	Runtime                    int     `json:"runtime,omitempty"`
	Id                         int     `json:"id,omitempty"`
	HumidityValue              float32 `json:"humidity_value,omitempty"`
	HumidityUnit               string  `json:"humidity_unit,omitempty"`
	TemperatureValue           float32 `json:"temperature_primary_value,omitempty"`
	TemperatureUnit            string  `json:"temperature_primary_unit,omitempty"`
	PressureValue              float32 `json:"pressure_value,omitempty"`
	PressureUnit               string  `json:"pressure_unit,omitempty"`
	TemperatureBackupValue     float32 `json:"temperature_secondary_value,omitempty"`
	TemperatureBackupUnit      string  `json:"temperature_secondary_unit,omitempty"`
	AltitudeValue              float32 `json:"altitude_value,omitempty"`
	AltitudeUnit               string  `json:"altitude_unit,omitempty"`
	IlluminanceValue           float32 `json:"illuminance_value,omitempty"`
	IlluminanceUnit            string  `json:"illuminance_unit,omitempty"`
	// WeatherShieldMoistureValue float32 `json:"weathershield_moisture_value,omitempty"`
	// WeatherShieldMoistureUnit  string  `json:"weathershield_moisture_unit,omitempty"`
	Timestamp                  int64   `json:"timestamp,omitempty"`
}

// The abstraction of the `SparkFun Weather Shield` reader.
type ArduinoReader struct {
	serialPort *serial.Port
}

// Constructor used to intialize the serial reader designed to communicate
// with Arduino configured for the `SparkFun Weather Shield` settings.
func NewSparkFunWeatherShieldReader(devicePath string) *ArduinoReader {
	log.Printf("READER: Attempting to connect Arduino device...")
	c := &serial.Config{Name: devicePath, Baud: 9600}
	s, err := serial.OpenPort(c)
	if err != nil {
		log.Fatal(err)
	}

	// DEVELOPERS NOTE:
	// The following code will warm up the Arduino device before we are
	// able to make calls to the external sensors.
	log.Printf("READER: Waiting for Arduino external sensors to warm up")
	ar := &ArduinoReader{serialPort: s}
	ar.Read()
	time.Sleep(5 * time.Second)
	ar.Read()
	time.Sleep(5 * time.Second)
	return ar
}

// Function returns the JSON data of the instrument readings from our Arduino
// device configured for the `SparkFun Weather Shield` settings.
func (ar *ArduinoReader) Read() *TimeSeriesData {
	// DEVELOPERS NOTE:
	// (1) The external device (Arduino) is setup to standby idle until it
	//     receives a poll request from this code, once a poll request has
	//     been submitted then all the sensors get polled and their data is
	//     returned.
	// (2) Please look at the following code to understand how the external
	//     device works in: <TODO ADD>
	//
	// (3) The reason for design is as follows:
	//     (a) The external device does not have a real-time clock
	//     (b) We don't want to add any real-time clock shields because
	//         extra hardware means it costs more.
	//     (c) We don't want to write complicated code of synching time
	//         from this code because it will make the code complicated.
	//     (d) Therefore we chose to make sensor polling be event based
	//         and this code needs to send a "poll request".

	// STEP 1:
	// We need to send a single byte to the external device (Arduino) which
	// will trigger a polling event on all the sensors.
	n, err := ar.serialPort.Write([]byte(RX_BYTE))
	if err != nil {
		log.Fatal(err)
	}

	// STEP 2:
	// The external device will poll the device, we need to make our main
	// runtime loop to be blocked so we wait until the device finishes and
	// returns all the sensor measurements.
	buf := make([]byte, 1028)
	n, err = ar.serialPort.Read(buf)
	if err != nil {
		log.Fatal(err)
	}

	// STEP 3:
	// Check to see if ANY data was returned from the external device, if
	// there was then we load up the string into a JSON object.
	var tsd TimeSeriesData
	err = json.Unmarshal(buf[:n], &tsd)
	if err != nil {
		return nil
	}
	tsd.Timestamp = time.Now().Unix()
	return &tsd
}

// Function used to print to the console the time series data.
func PrettyPrintTimeSeriesData(tsd *TimeSeriesData) {
	fmt.Println("Status: ", tsd.Status)
	fmt.Println("Runtime: ", tsd.Runtime)
	fmt.Println("Status: ", tsd.Id)
	fmt.Println("HumidityValue: ", tsd.HumidityValue)
	fmt.Println("HumidityUnit: ", tsd.HumidityUnit)
	fmt.Println("TemperatureValue: ", tsd.TemperatureValue)
	fmt.Println("TemperatureUnit: ", tsd.TemperatureUnit)
	fmt.Println("PressureValue: ", tsd.PressureValue)
	fmt.Println("PressureUnit: ", tsd.PressureUnit)
	fmt.Println("TemperatureBackupValue: ", tsd.TemperatureBackupValue)
	fmt.Println("TemperatureBackupUnit: ", tsd.TemperatureBackupUnit)
	fmt.Println("AltitudeValue: ", tsd.AltitudeValue)
	fmt.Println("AltitudeUnit: ", tsd.AltitudeUnit)
	fmt.Println("IlluminanceValue: ", tsd.IlluminanceValue)
	fmt.Println("IlluminanceUnit: ", tsd.IlluminanceUnit)
	fmt.Println("Timestamp: ", tsd.Timestamp)
}
(5 of 5) cmd/read_once.go
package cmd // github.com/bartmika/serialreader-cli/cmd/read_once.go

import (
	"log"
	// "os"
	// "os/signal"
	// "syscall"
	"time"

	"github.com/spf13/cobra"

	"github.com/bartmika/serialreader-cli/internal/utils"
)

var (
	arduinoDevicePath string
)

func init() {
	// The following are required.
	readOnceCmd.Flags().StringVarP(&arduinoDevicePath, "arduino_path", "f", "/dev/cu.usbmodem14201", "The location of the connected arduino device on your computer.")
	readOnceCmd.MarkFlagRequired("arduino_path")

	rootCmd.AddCommand(readOnceCmd)
}

var readOnceCmd = &cobra.Command{
	Use:   "read_once",
	Short: "-",
	Long:  `-`,
	Run: func(cmd *cobra.Command, args []string) {
		doReadOnce()
	},
}

func doReadOnce() {
	// Establish our device connection.
	reader := utils.NewSparkFunWeatherShieldReader(arduinoDevicePath)

	log.Println("READER: Wait a few seconds...")
	time.Sleep(5000 * time.Millisecond)

	log.Println("READER: Polling device...")
	tsd := reader.Read()

	log.Println("READER: Result:")
	utils.PrettyPrintTimeSeriesData(tsd)
}
Let’s run the code!
In your terminal please write the following and replace the /dev/cu.usbmodem14401 value with the value you’ve saved previously. Hit *Enter and if everything works you should see something like this:
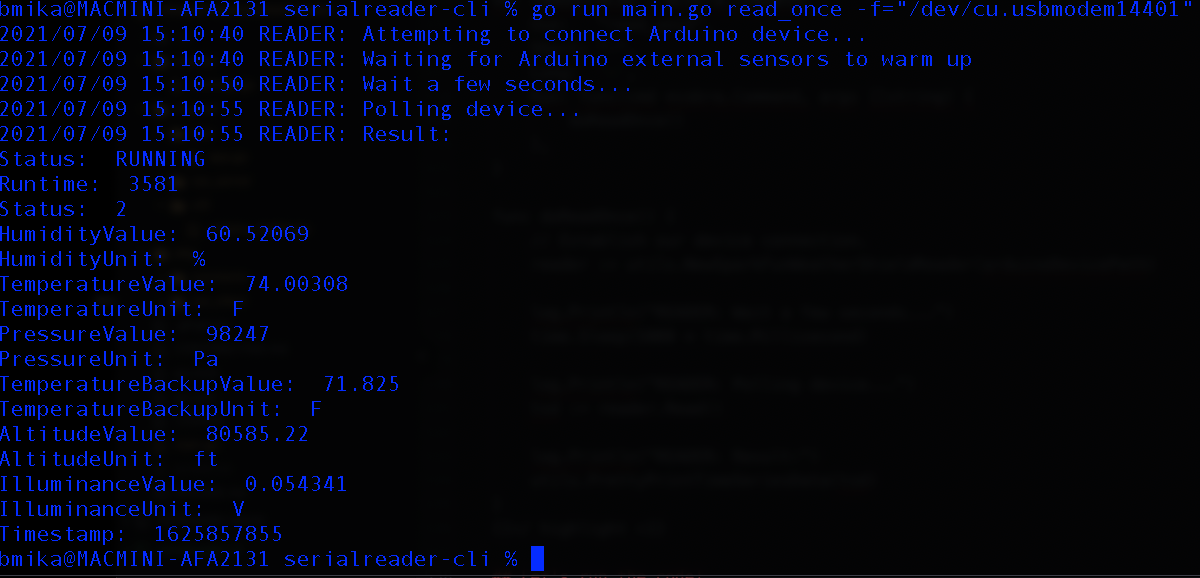
If you are having difficulty reading the above, the output text is as follows:
2021/07/09 15:10:40 READER: Attempting to connect Arduino device...
2021/07/09 15:10:40 READER: Waiting for Arduino external sensors to warm up
2021/07/09 15:10:50 READER: Wait a few seconds...
2021/07/09 15:10:55 READER: Polling device...
2021/07/09 15:10:55 READER: Result:
Status:  RUNNING
Runtime:  3581
Status:  2
HumidityValue:  60.52069
HumidityUnit:  %
TemperatureValue:  74.00308
TemperatureUnit:  F
PressureValue:  98247
PressureUnit:  Pa
TemperatureBackupValue:  71.825
TemperatureBackupUnit:  F
AltitudeValue:  80585.22
AltitudeUnit:  ft
IlluminanceValue:  0.054341
IlluminanceUnit:  V
Timestamp:  1625857855
Where do we go from here?
You know how to read from the device, but how do you share the functionality between many applications? In the next post we will attach a gRPC service definition overtop of our code.