 Photo by Harrison Broadbent on Unsplash.
Wouldn’t it be cool to remotely program a Golang app on a Raspberry Pi? In this post, I write how to do that if you are using Atom.
TL;DR;
- Setup a Raspberry Pi Device
- Setup Golang on that Device
- Install
remote-ftpon your Machine- Connect from your Atom
- Write a Golang Application
Please note, before we begin, I am using a Mac so this tutorial is assuming you have either a Mac or Linux computer. If you are using Windows, I recommend using a Linux emulator like Cygwin.
1. Setup a Raspberry Pi Device
Setup OS
Let’s start by downloading the Raspberry Pi OS onto your computer. Next follow this 45 second video explaining how to setup the OS onto a flash drive:
Headless Configuration
Once you have the card created, please follow this article How to Set Up a Headless Raspberry Pi, Without Ever Attaching a Monitor to get everything configured so you won’t have to manually SSH into system and manually configure.
How to Find your IP Address
According to the Raspberry Pi docs, we can use the existing multicast DNS to get the IP address on our machine by running the following command:
ping raspberrypi.local
This command will return the IP address of the device! In our example, we will use 192.168.1.138.
SSH Into your Device
On your machine, please run:
ssh -l pi 192.168.1.138When asked about authenticity of the device, please select yes.
When asked about password, please enter
raspberry. You should now be in!
Passwordless SSH Access
This is an essential step, please read the Raspberry Pi documentation and follow along with their instructions.
2. Setup Golang on that Device
Let’s SSH into your Raspberry Pi. In a new terminal windows, please run the following command:
ssh -l pi 192.168.1.138Next check to see the latest version of Golang. To get the latest version, browse the Go download page and look for the latest version. Search for “ARM v6 version” for the Raspberry Pi.
Whichever archive you choose, use wget to download it:
mkdir ~/src
cd ~/src
wget https://dl.google.com/go/go1.17.8.linux-arm64.tar.gz
Please note that if you are using a 32bit OS then download the
armv6l, else if you are using 64bit OS then downloadarmv64.Now you’ll want to extract the package into your local folder:
sudo tar -C /usr/local -xzf ~/src/go1.17.8.linux-arm64.tar.gzClean up.
rm go1.17.8.linux-arm64.tar.gzOpen the following:
vi ~/.profileAnd append the following:
PATH=$PATH:/usr/local/go/bin
GOPATH=$HOME/go
Update your shell with your changes:
source ~/.profileFinally run the following to confirm that
goworks:go versionAnd the output should be:
go version go1.17.8 linux/arm64
3. Install remote-ftp on your Machine
We are going to get your Atom to connect with the Raspberry Pi by using remote-ftp.
To start go to the following: Atom > Preferences > Install
Search for
remote-ftpand click install. When finished you should see: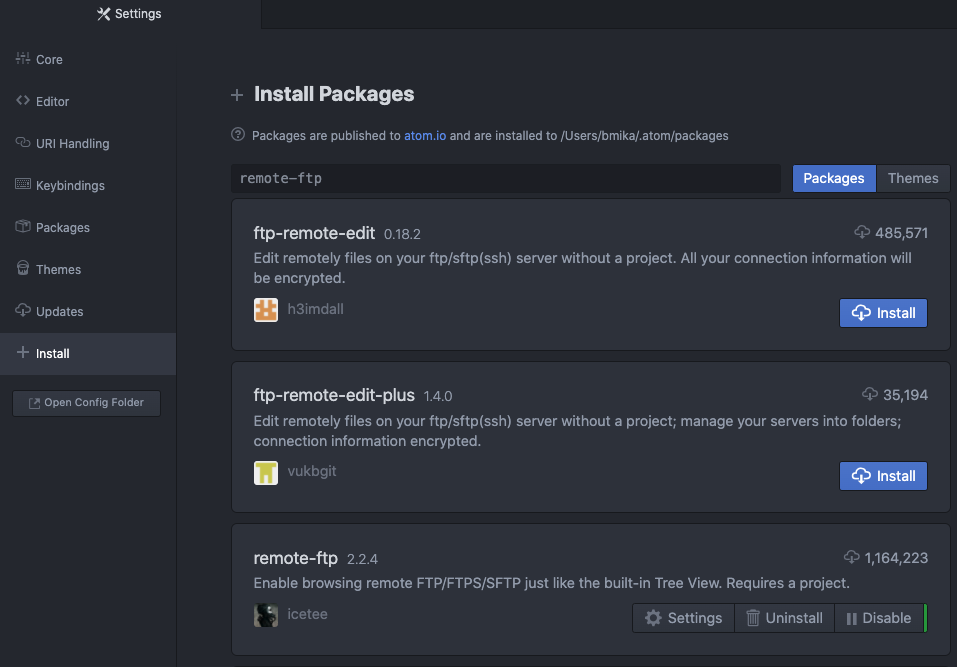
Next click the Packages and select the remote-ftp.
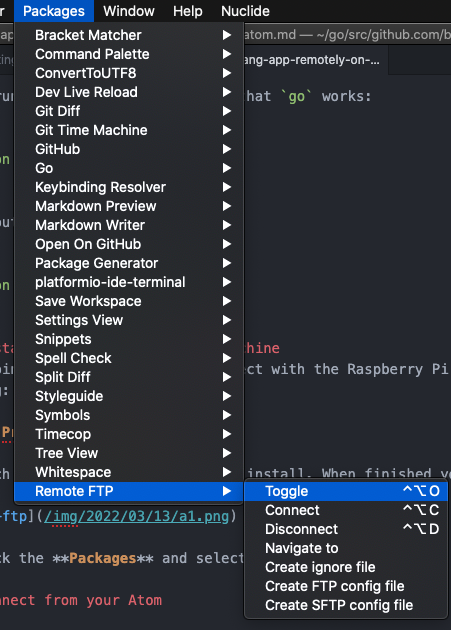
4. Connect from your Atom
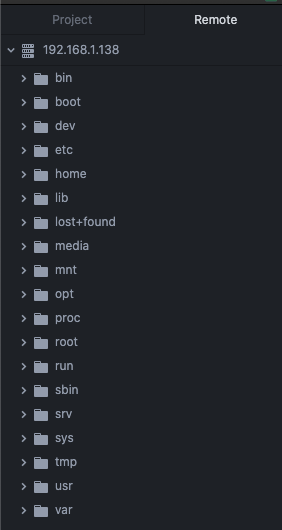
Click on Remote and you should see:
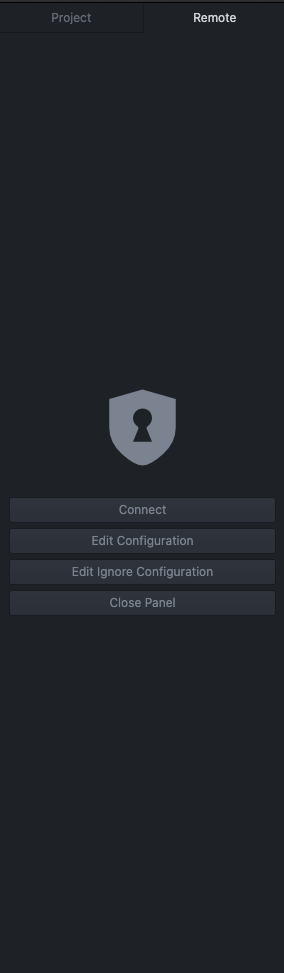
Afterwords click Edit Configuration and you will see a blank file. You need to fill out the document. Check out the developers docs to read and learn more. I’ve modified the following SFTP configuration for my purposes:
{
    "protocol": "sftp",
    "host": "192.168.1.138", // string - Hostname or IP address of the server. Default: 'localhost'
    "port": 22, // integer - Port number of the server. Default: 22
    "user": "pi", // string - Username for authentication. Default: (none)
    "pass": "rasbperry", // string - Password for password-based user authentication. Default: (none)
    "promptForPass": false, // boolean - Set to true for enable password/passphrase dialog. This will prevent from using cleartext password/passphrase in this config. Default: false
    "remote": "/", // try to use absolute paths starting with /
    "agent": "", // string - Path to ssh-agent's UNIX socket for ssh-agent-based user authentication. Linux/Mac users can set "env" as a value to use env SSH_AUTH_SOCK variable. Windows users: set to 'pageant' for authenticating with Pageant or (actual) path to a cygwin "UNIX socket." Default: (none)
    "privatekey": "/Users/bmika/.ssh/id_rsa", // string - Absolute path to the private key file (in OpenSSH format). Default: (none)
    "passphrase": "", // string - For an encrypted private key, this is the passphrase used to decrypt it. Default: (none)
    "hosthash": "", // string - 'md5' or 'sha1'. The host's key is hashed using this method and passed to the hostVerifier function. Default: (none)
    "ignorehost": true,
    "connTimeout": 10000, // integer - How long (in milliseconds) to wait for the SSH handshake to complete. Default: 10000
    "keepalive": 10000, // integer - How often (in milliseconds) to send SSH-level keepalive packets to the server (in a similar way as OpenSSH's ServerAliveInterval config option). Set to 0 to disable. Default: 10000
    "keyboardInteractive": false, // boolean - Set to true for enable verifyCode dialog. Keyboard interaction authentication mechanism. For example using Google Authentication (Multi factor)
    "keyboardInteractiveForPass": false, // boolean - Set to true for enable keyboard interaction and use pass options for password. No open dialog.
    "watch":[ // array - Paths to files, directories, or glob patterns that are watched and when edited outside of the atom editor are uploaded. Default : []
        "dist/stylesheets/main.css", // reference from the root of the project.
        "dist/stylesheets/",
        "dist/stylesheets/*.css"
    ],
    "watchTimeout":500, // integer - The duration ( in milliseconds ) from when the file was last changed for the upload to begin.
    "filePermissions":"0644" // string - Permissions for uploaded files. WARNING: if this option is set, previously set permissions on the remote are overwritten!
}
The following changes you’ll need to do:
host- This is the IP address of your Raspberry Pi, we replaced with our value192.168.1.138.user- Change to the username of admin on the Raspberry Pi, we change topi.pass- Change to the default passwordraspberry.privatekey- Set the location of your private key. For me, I am using a Mac and this is the location of my private key via the value of/Users/bmika/.ssh/id_rsa.
Finally when you finish, save the file.
When you are ready, click Connect and if everything works you should see the following:
5. Write a Golang Application
While connected, open up to the
/home/pifolder: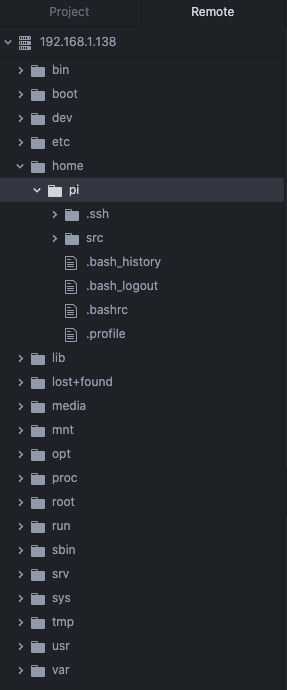
Then right click and click Add File:
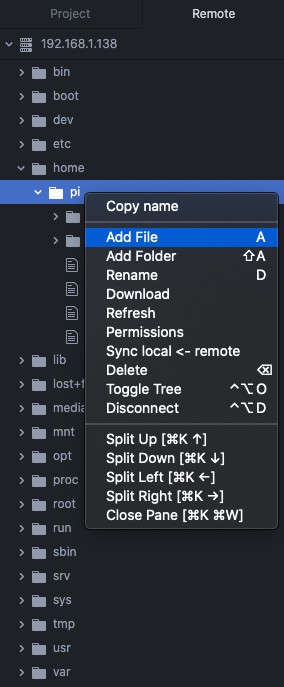
When you click it will ask you to input the file name.

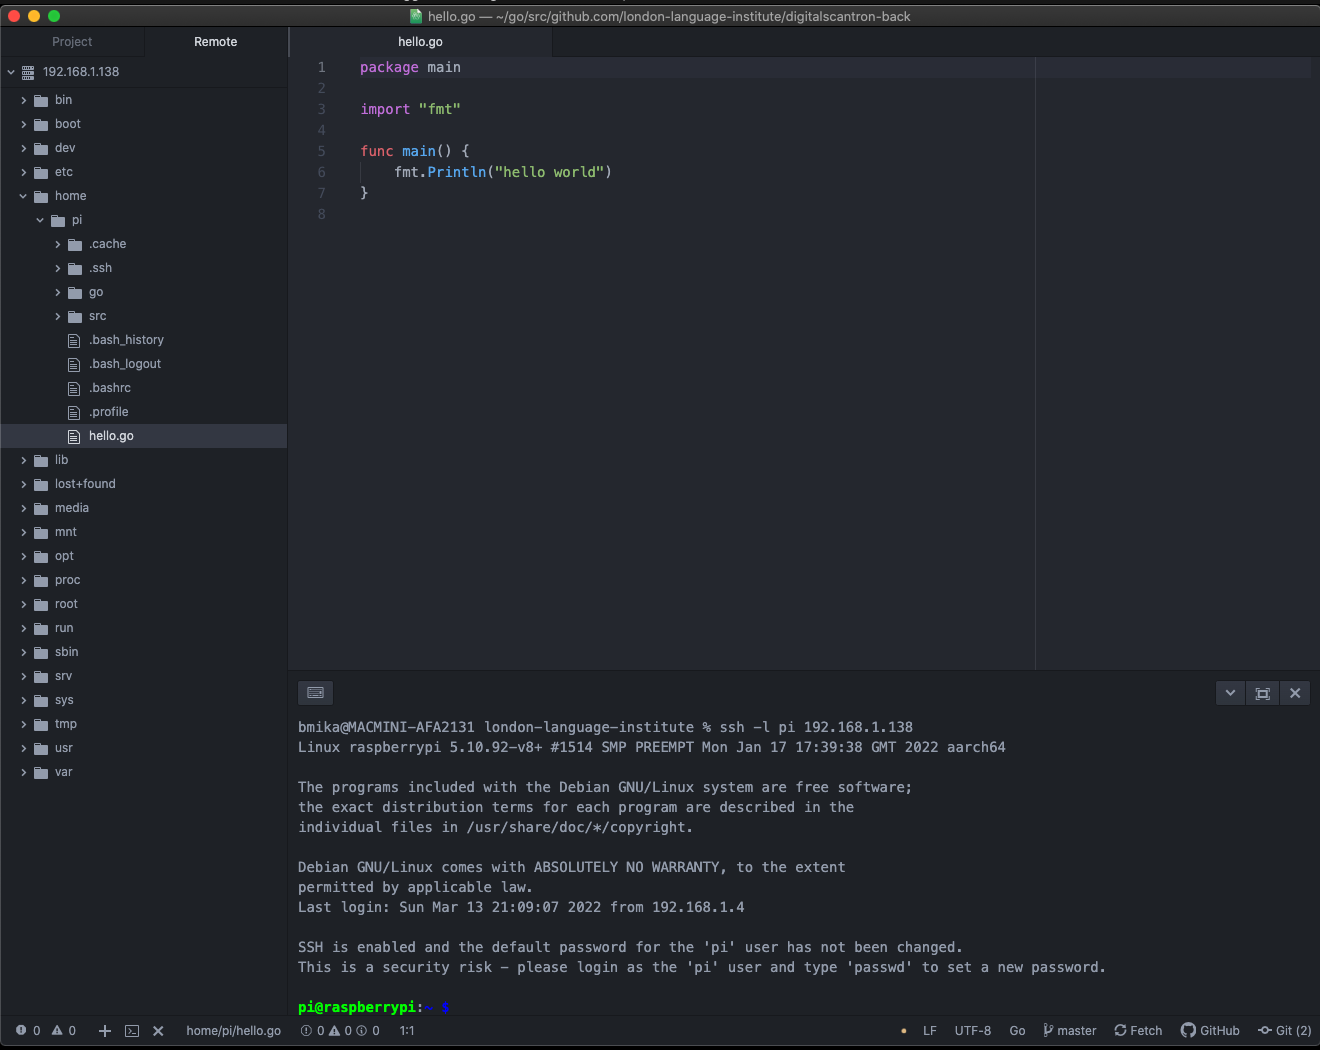
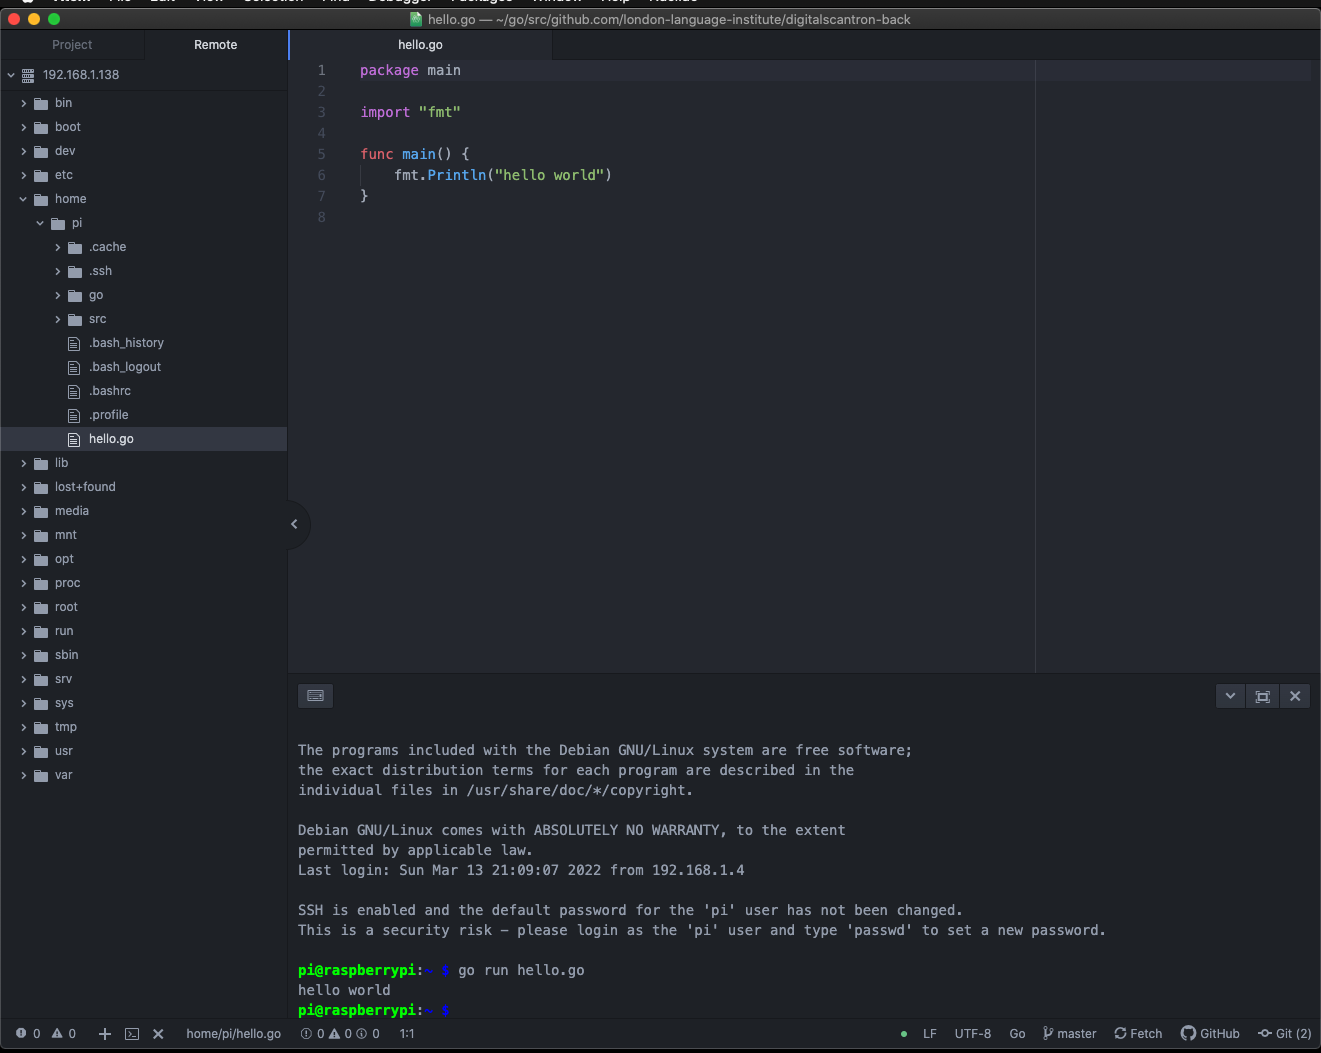
Go ahead and let’s create our hello.go file. Afterwards enter a simple program. You should see this.
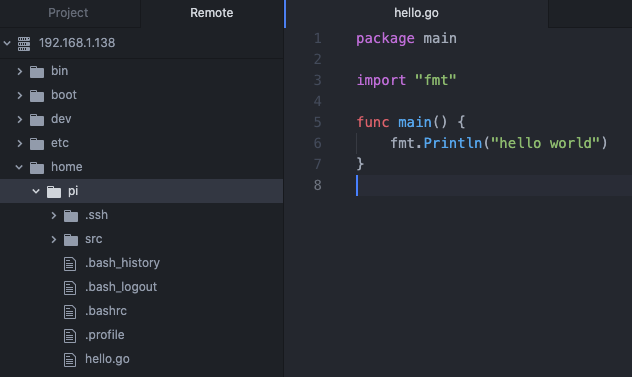
Finally in your open terminal (outside of Atom), run the following code and you should see the code running!
Bonus Points: Run Terminal inside Atom
Go to Atom > Preferences > Install and search for platformio-ide-terminal.
We are going to get your Atom to connect with the Raspberry Pi by using
remote-ftp. To start go to the following: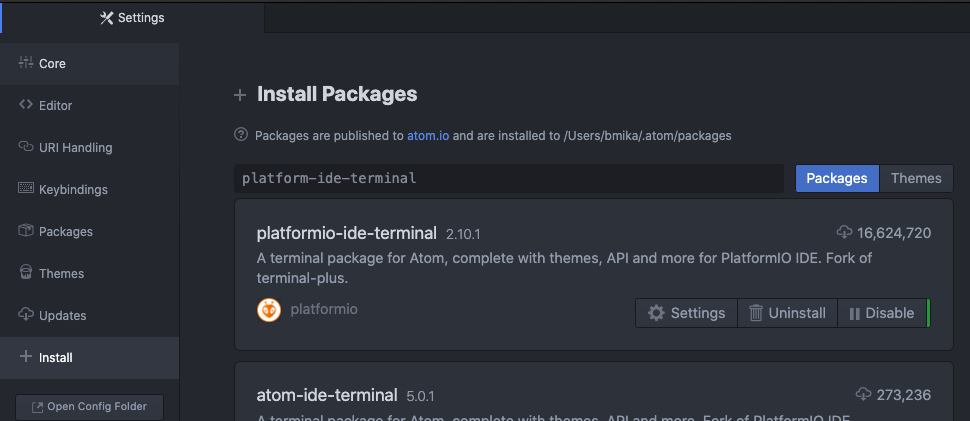
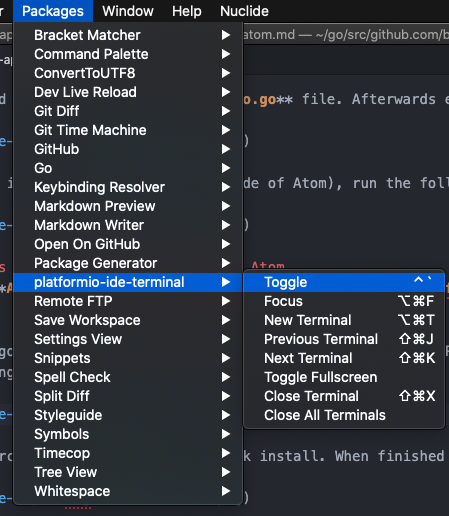
Next click the Packages and select the platformio-ide-terminal.
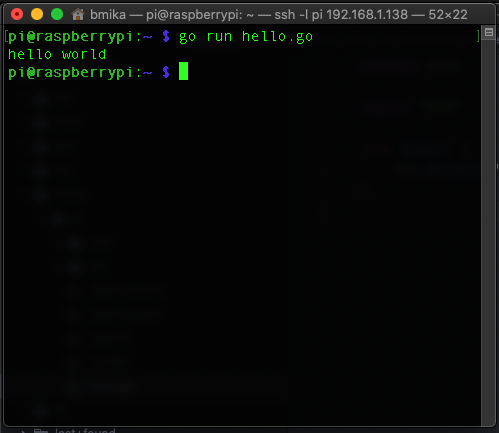
A terminal will load up at the bottom of the screen, enter the command to SSH into your Raspberry Pi:
ssh -l pi 192.168.1.138This is it! You should see:
While logged in, run the Golang app:
go run hello.goAnd you should see something like this:
Finally go ahead and run
Conclusion
Atom, and its plugins are all you need to start remote development with Golang.
Happy coding!
See also
- How to Containerize a Golang App With Docker for Development and Production
- How to Perform RSA Encryption in Javascript (React.js) and Golang
- Quickstart to Building Golang Apps using IPFS
- Docker Learning Resources for Absolute Beginners Programming With Golang
- How to Build a gRPC Server over tstorage to create tstorage-server